A Practical Guide for Brands and Designers Developing Custom Glassware
A product rendering can look complete. The shape is clear, the proportions feel balanced, and the colors and decorative details may appear exactly as intended.
But a visually complete design is not automatically ready for glassware manufacturing.
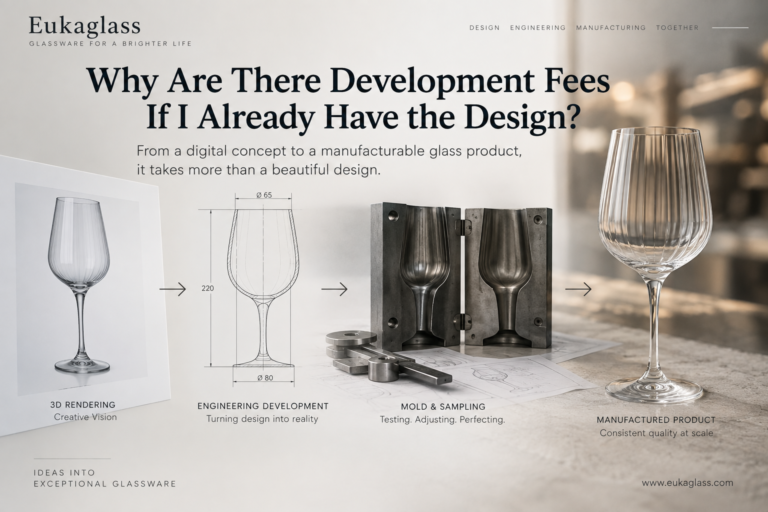
A rendering communicates design intent. A manufacturer still needs to translate that intent into dimensions, materials, tooling, tolerances, decoration methods, and production controls.
This distinction matters because many delays in custom glassware development begin with the same assumption: if the rendering is finished, the product should be ready for sampling.
In reality, the rendering is often the starting point for manufacturing development—not the final manufacturing file.
What a Rendering Can—and Cannot—Define
A good rendering is extremely valuable. It can communicate:
- Overall shape and proportions
- Color direction
- Decorative elements
- Logo or artwork placement
- Brand character
- Intended visual experience
However, a glassware manufacturer must answer a different set of questions before production can begin:
- What are the exact dimensions and capacity?
- Which glassmaking process is suitable?
- Can an existing mold be used, or is new tooling required?
- Is the shape practical to form and release?
- What wall thickness and weight range are achievable?
- Which tolerances are realistic?
- How should the decoration be applied and fired?
- Does the artwork need adjustment for a curved surface?
- Which details must be confirmed through a physical prototype?
A rendering answers:
“What should the product look like?”
Manufacturing development answers:
“How can we make it reliably?”
The Three Stages Between an Idea and Production
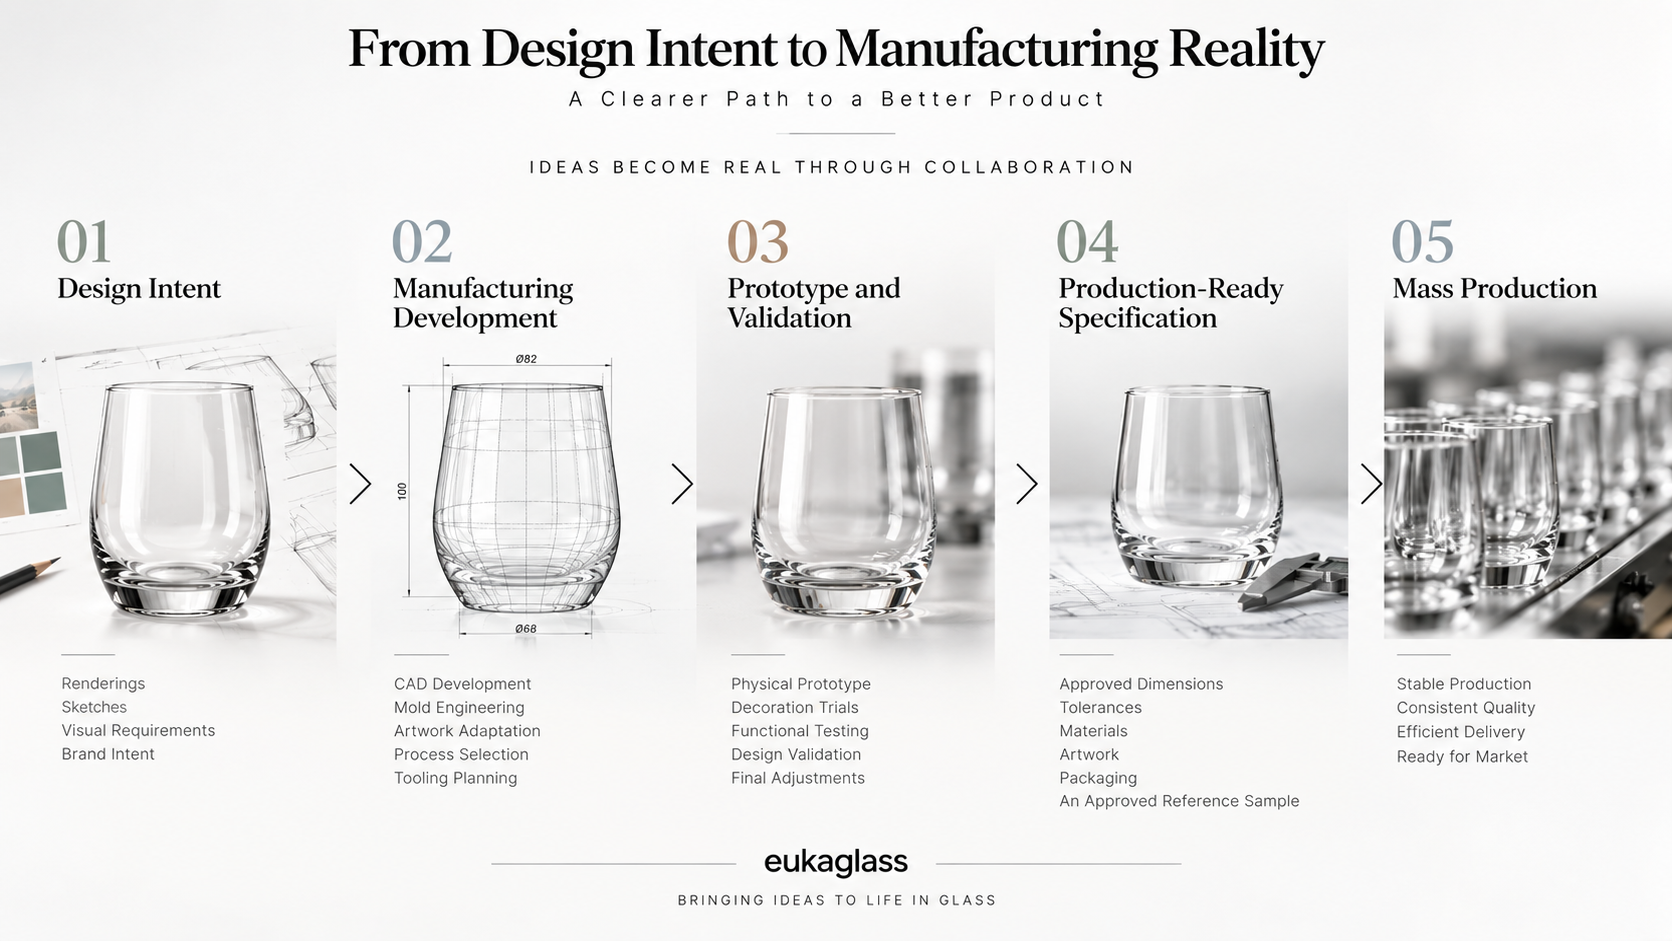
Custom glassware development becomes clearer when the product definition is divided into three stages. 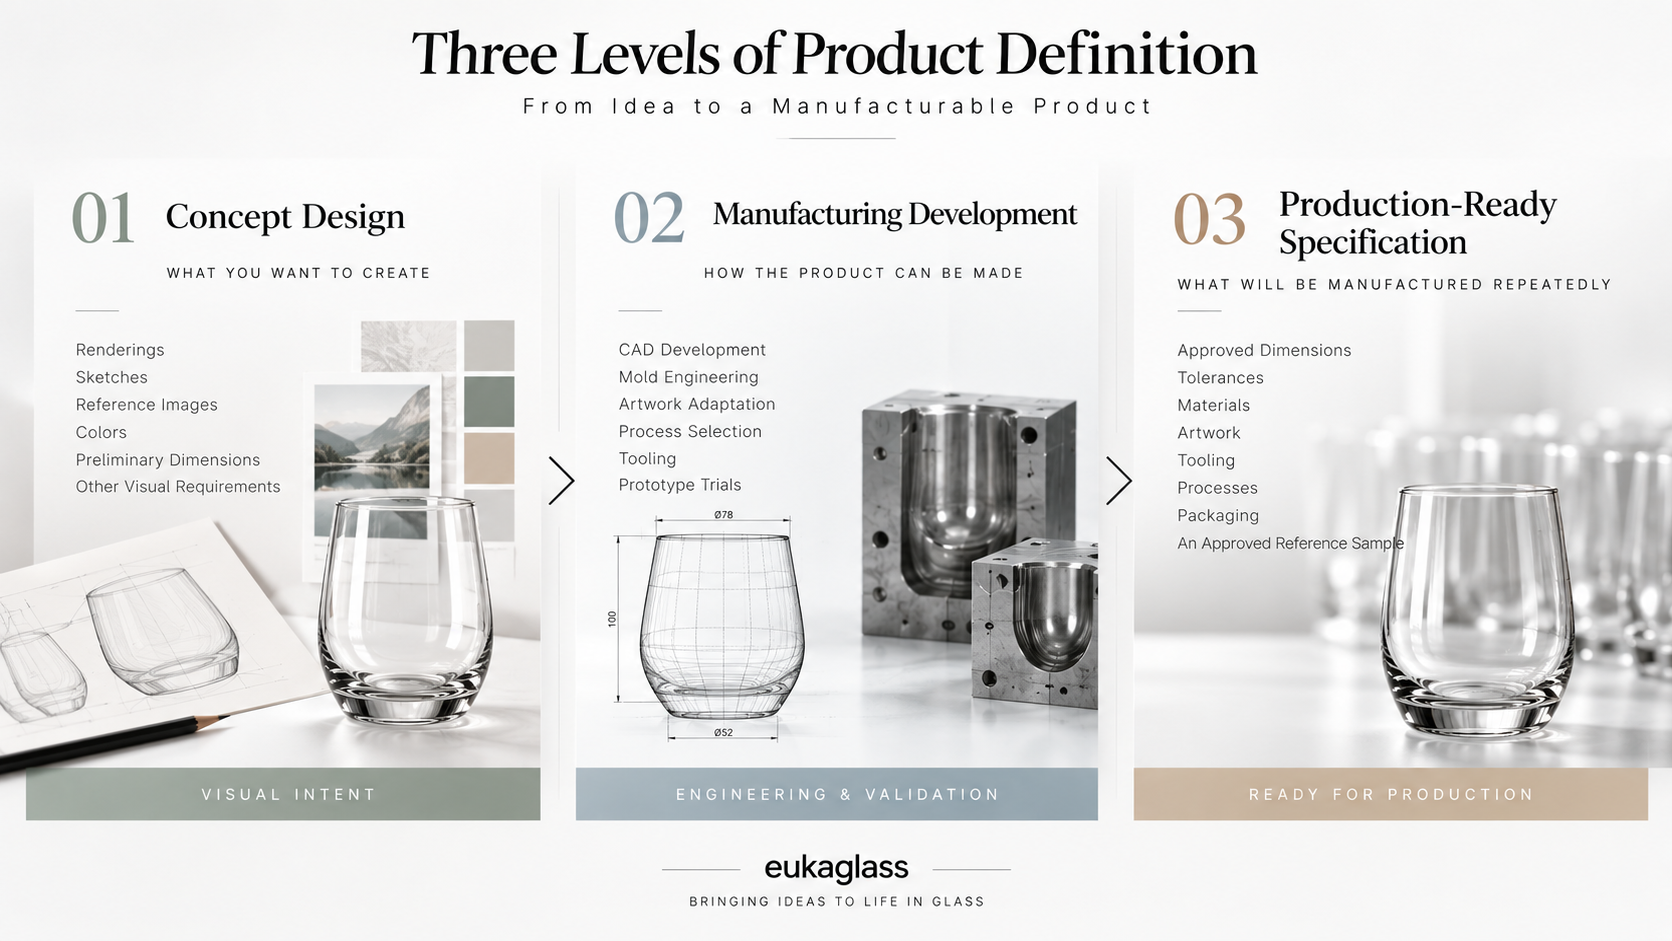 1. Concept Design
This stage may include renderings, sketches, reference products, preliminary dimensions, color direction, and decoration ideas.
Its purpose is to define the desired product and brand experience.
2. Manufacturing Development
The manufacturer translates the concept into a practical production route. Depending on the project, this may involve:
- Technical drawings or CAD
- Mold engineering
- Material and process selection
- Artwork adaptation
- Decoration trials
- Tooling
- Prototype development
- Packaging evaluation
Its purpose is to determine how the product can physically be made.
3. Production-Ready Specification
After physical validation, the approved product must be documented clearly enough for repeatable manufacturing.
The final specification may include:
- Approved dimensions and capacity
- Weight range and wall thickness
- Material
- Tolerances
- Tooling version
- Color reference
- Decoration method and artwork version
- Logo position
- Packaging requirements
- Quality criteria
- Approved reference sample
Its purpose is to define what the factory must reproduce during mass production.
These three stages are connected, but they are not interchangeable.
Example 1: Applying Flat Artwork to Curved Glassware
Imagine a custom wine glass with artwork covering a large part of the bowl.
The rendering may show the desired visual result clearly. However, the production artwork cannot always be taken directly from the original two-dimensional file.
A wine glass bowl has changing diameters and continuous curvature. When flat artwork is applied to that surface, the design may stretch, distort, or create visible seams.
Before production, the artwork may need to be:
- Geometrically adjusted to match the curve
- Divided into printable sections
- Repositioned to control seams
- Adapted to the selected decoration process
- Tested for color and distortion after firing
The original artwork is not incorrect. It has simply completed the design stage.
It must still be converted into decoration-ready production artwork.
Example 2: Turning an Original Shape into Mold Tooling
The same issue applies to a custom glass shape.
A rendering can show the intended profile, base, stem, or structural details. But the factory still needs to determine:
- How the geometry should be translated into CAD
- What mold structure is required
- How the molten glass will behave during forming
- Whether the product can be released from the mold reliably
- Which details may need engineering adjustment
- What tolerances are achievable
- Which features must be validated through trial production
The development path may look like this:
Rendering → CAD → Mold Engineering → Tooling → Trial Production → Physical Evaluation
A visually simple design can still require careful engineering.
Small changes in angle, thickness, opening size, or structural balance may affect whether the product can be manufactured consistently.
Why Custom Glassware Manufacturing Requires More Development
For a standard glass with a simple logo, the distance between design and production may be small.
For an original shape, solid color, complex surface decoration, multiple components, or custom packaging, the development gap can be much larger.
This is why the following statements do not mean the same thing:
“The design is finished.”
“The product is ready for production.”
Between them sits manufacturing development.
This stage is not an unnecessary complication or a correction of the designer’s work. It is the technical process required to convert a visual concept into a manufacturable product.
What to Provide for a Manufacturing Assessment
Brands, designers, and sourcing teams do not need to solve every manufacturing question before contacting a supplier.
However, providing clear project information can make the initial assessment faster and more accurate.
Useful information includes:
- Rendering, sketch, or reference product
- Preliminary dimensions and capacity
- Intended use
- Target market
- Estimated order quantity
- Preferred material or glass type
- Color requirements
- Logo or decoration files
- Packaging expectations
- Target launch date
- Features that must not be changed
If some details are still open, identify them clearly.
Separating confirmed requirements from development questions helps prevent misunderstandings later.
Seven Questions to Resolve Before Sampling
Before ordering a custom glassware sample, confirm the following points with the manufacturer:
- Manufacturing process: Which process is recommended, and why?
- Tooling: Is an existing mold suitable, or is custom tooling required?
- Dimensions: Which dimensions are confirmed, and which still require engineering?
- Tolerances: What level of variation is realistic?
- Decoration: Does the artwork need to be adapted or tested?
- Prototype purpose: What exactly will the first sample validate?
- Next steps: What may still change after the first physical evaluation?
These questions create a clearer development scope and reduce the risk of treating the first prototype as a final production sample.
A Better Custom Glassware Development Path
A practical development process usually follows this sequence:
Design Intent → Technical Assessment → CAD and Engineering → Tooling or Process Development → Prototype → Evaluation → Production-Ready Specification → Mass Production
For simple customization, several stages may be combined.
For more complex projects, decoration, packaging, and structural development may run in parallel.
The objective is not to add more steps. It is to answer the right questions before they become tooling changes, failed samples, or production delays.
From Rendering to Manufacturing Reality
A beautiful rendering is an important milestone, but it is not yet a manufacturing file.
The rendering defines the creative direction. Manufacturing development turns that direction into tooling, decoration methods, tolerances, prototypes, and production standards.
The strongest custom glassware projects begin when designers and manufacturers work together early—before every visual detail is assumed to be technically fixed.
At Eukaglass, we help brands, retailers, designers, and product development teams turn custom glassware concepts into practical manufacturing paths, including technical assessment, mold development, decoration, sampling, packaging, and production.
Already have a rendering for a custom glassware project?
Share the design with your target dimensions, quantity, market, and timeline. We can help identify what is ready for the next development stage—and what still needs to be defined before sampling or production.
FOR PROFESSIONAL BUYERS
Planning a Glassware Project?
Discuss product requirements, samples, sourcing, manufacturing, or OEM development with our team.